A Guest Post by Pietro Massai, Architect and BIM Manager
Everyone who works in the architecture, engineering, and construction (AEC) industry understands the benefits of Building Information Modeling (BIM) for our work. We know that BIM is extremely useful and a tool that we cannot live without. But the question is, how do we convince our clients of the advantages of BIM? We can tell them that they will gain cost certainty, reduce wastage, and have fewer problems on site, but it can be difficult for them to truly believe this until they experience it for themselves. They need to see BIM in action. So, how can we show our clients the benefits of BIM when they are not directly involved in the design and construction process?
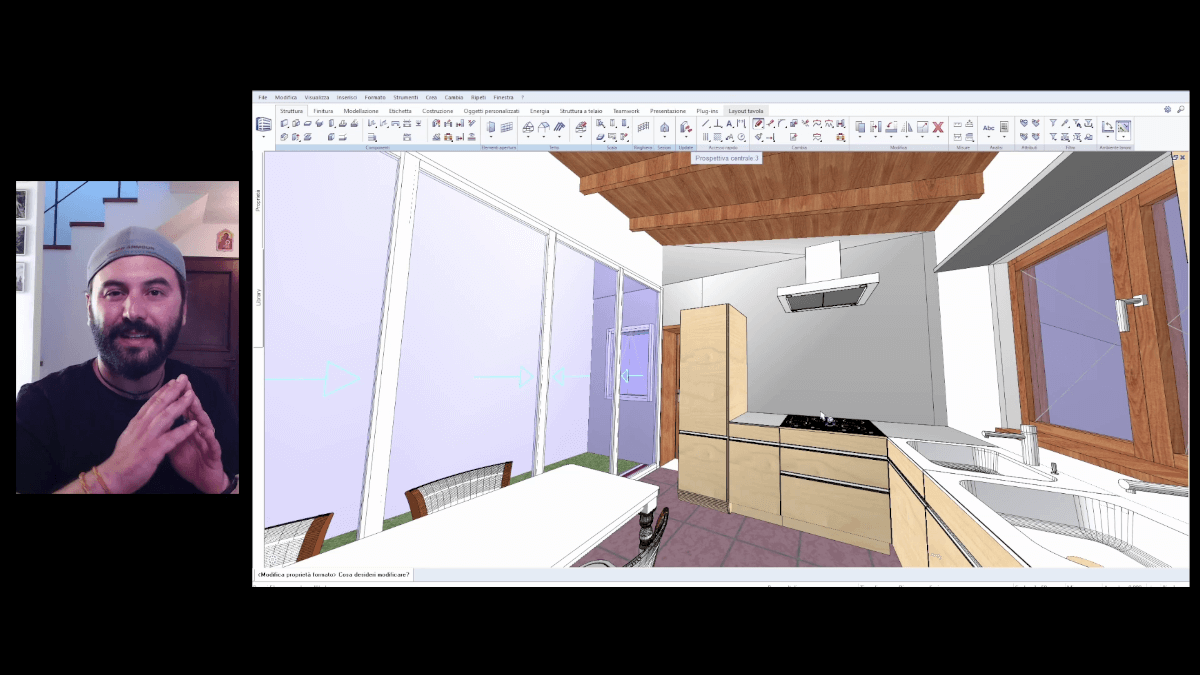 © Pietro Massai; Preparing the BIM model of the client's kitchen with Allplan
A solution I have found is to literally show the client their project and let them experience it before it is built. One way to do this is with a virtual reality headset, a smartphone, and a 360° photo created from the BIM model. With these, you can create a virtual reality scene that lets the client experience the space and address any issues or make any changes before the project is built – and understand the impact of those changes. Suddenly, the client can see not only what their project will look like, but also the value of having asset information at an early stage.
This all begins with the model, which I create with Allplan as my BIM-enabled software. In this guide, I’ll outline an easy, step-by-step process to create an immersive virtual reality experience of your client’s project which you can use to show them how they can benefit from BIM.
 © Pietro Massai; Defining different layers: this is useful for quantity checks (estimating) and for the definition of rendering materials
Setting the Scene in Allplan
To get started, there are three things that we have to take care of in the model to create the virtual reality scene: textures, lights, and camera. It is like setting up a stage for a movie production, and I will show you how to manage these three aspects in Allplan.
Once you have your model designed in Allplan, you can start adding material textures to objects. For example, if you are designing a house and wanted to show a client their new kitchen, you would add textures to the walls and other features. Perhaps the walls will be white plaster, the floor tiled, the ceiling made from dark wood, and the cupboards and window frames made from a different type of wood.
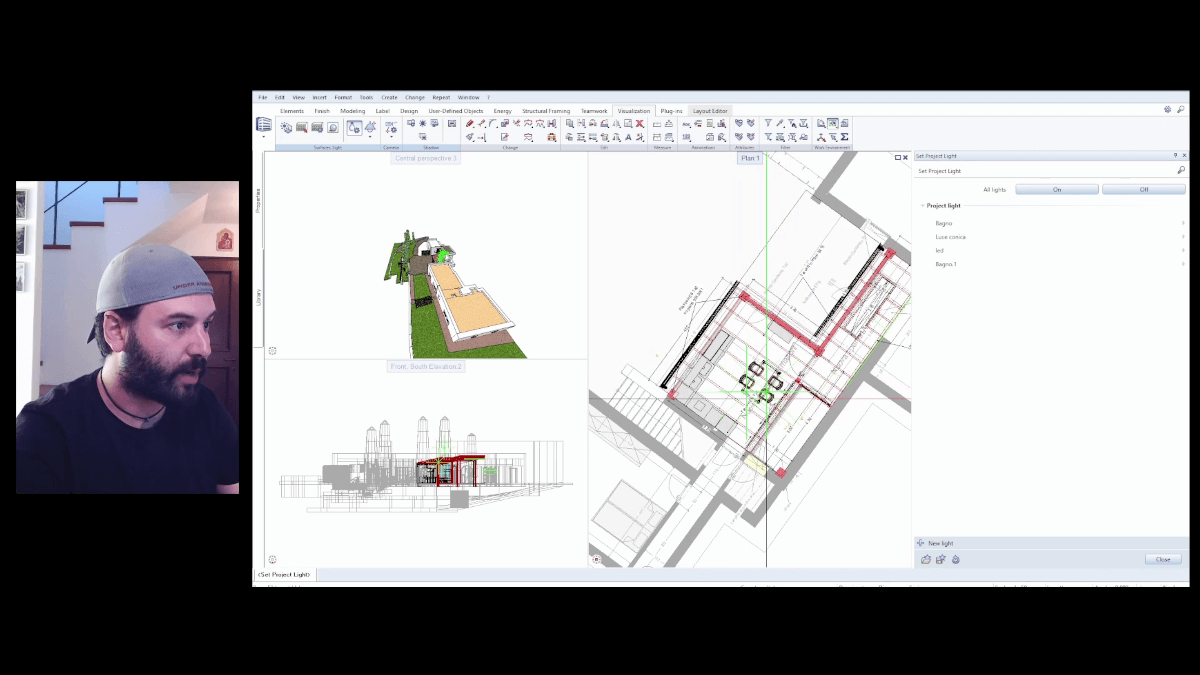 © Pietro Massai; How to create and manage lights inside the Allplan BIM model
By double-clicking on any of these elements in Allplan, you can change the Aspect to a different surface texture. This will open another window where you can select the texture you want, either from your own custom surfaces or from Allplan’s library. Simply apply these textures to the objects in the room, and suddenly the space looks less like a design model and more like a real house.
Next, we take care of the lighting. In the Visualization tab, there is an option called Surroundings. Here, we can check that the north direction is correctly positioned in relation to the model. Then, we also need to choose a date and time, as this will affect the sun’s position. Inputting this information sets the natural light that will be present in the scene.
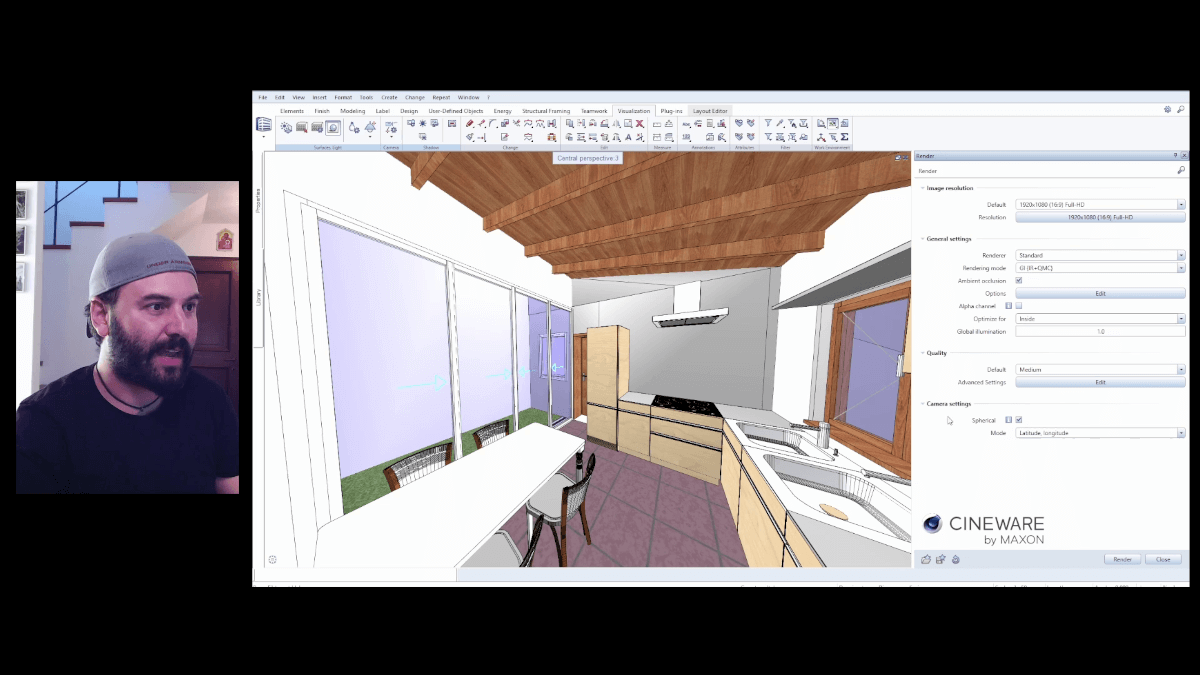 © Pietro Massai; Defining rendering parameters: Allplan 2022 allows you to render 360 images internally
After that, we go to Visualization > Set Project Lights. This will show us where the interior lighting is within the project, highlighted by green markers. While interior lighting is a whole design area of its own, the important part of this step is that lights are added to the project and the option to turn the lights on is selected.
Finally, it’s time to set the camera. If you go into the 3D view (using the buttons on the bottom left of the screen,) a window with the camera settings appears. Remember that in Allplan, the vertical plane is the Y axis. Therefore, to get a straight-on view of the room, you need to set the Y axis to 0 under the Target Point option. This means you’ll be looking straight at the horizon and not up or down.
Once these options are set, go to Visualization > Render. In these options, you can set the definition to the size you want – Allplan allows full HD and a range of different picture ratios. Under General Settings, make sure that the Ambient Occlusion option is ticked and the Optimize For option is set to Interior. And under Camera Settings, tick the Spherical option and set the Mode to Latitude, Longitude. Now it’s time to click the Render button at the bottom.
When the render is complete, you’ll have a stunning picture of your scene up on your screen. In the Render window, you can adjust settings such as color saturation, brightness, and contrast if you like, then click Save As a Bitmap. Save the file somewhere convenient, ready for the next step.
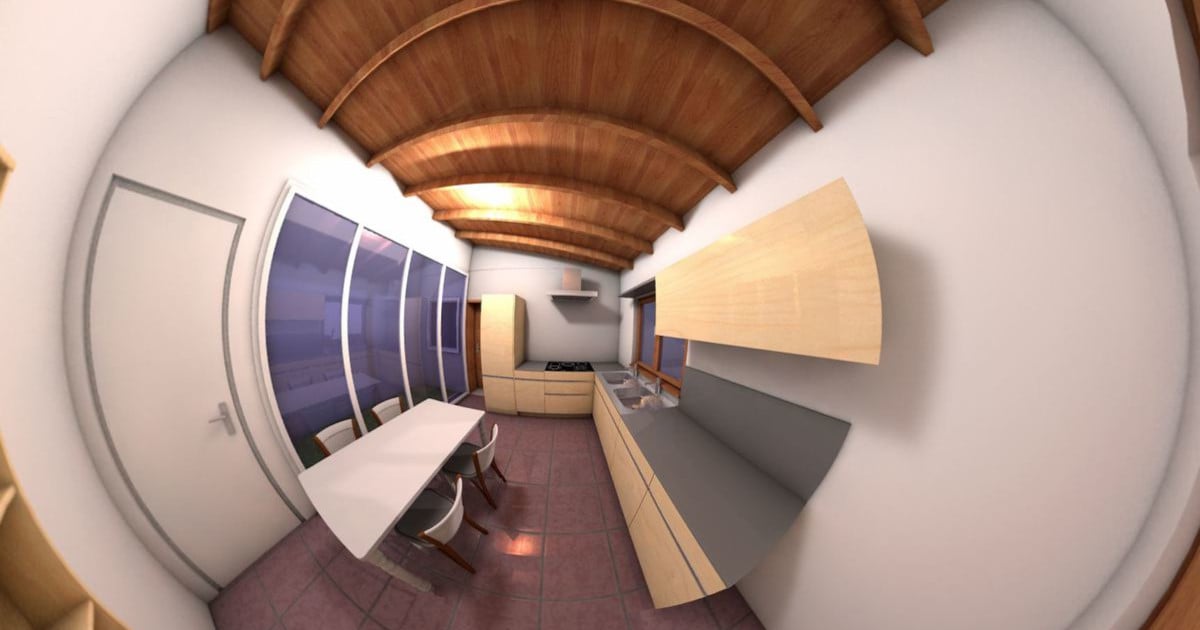 © Pietro Massai; Equirectangular representation of the 360 render saved as a normal image: due to the deformation of the 360 image, it needs to be uploaded to a specific website or opened with specific software. This allows the client to see the 360 render on any device.
Creating the Virtual Reality Experience
I highly recommend using RICOH THETA to create the 360° photo. The program is free to download and will let you perfectly navigate the scene we just created with Allplan. Simply drag and drop the file into RICOH THETA, and you can view the room from any angle.
But how do we get this photo onto a smartphone so that we can view it using the virtual reality headset? Here, I prefer to use Momento360 – simply visit their website and create an account if you don’t already have one. They have a free plan that offers 2GB of storage for your photos. On the Dashboard, go to My Media and upload the photo from Allplan.
Next, you can visit Momento360 on your smartphone and log in again. On the top left, just search My Media for the right photo. Tap on the photo to open it, and then on the right there is a Glasses icon. Tap the icon, rotate your phone sideways and put it into your preferred headset. Now your client can view their room in virtual reality – trust me, they will go crazy!
The Value of BIM for Clients
Being able to show your clients their project in virtual reality with just a few easy steps can help show them the power of BIM. With this method, your clients can visualize the space and layout and make changes if they aren’t happy – which is the value of 3D design. With BIM, the additional information in the model can also help to understand other characteristics, such as the weight of an object, or the thermal transmittance. With this data, you can anticipate the problems you might have on site and undertake value engineering. 3D design helps you understand the quantities, but not necessarily the quality – you need BIM for that.
When you show them the virtual reality scene you’ve created, what you will see is that your clients start designing. The building site is brought into the computer where they can understand and visualize it. But with BIM, your clients gain the tools they need to make informed decisions throughout the project and understand the impact of those decisions based on facts – and that is the real value of BIM.